
With a large amount of website caching options out there today some are often better than others. After testing countless options and different configurations we’ve come up with one of the most highly efficient and fastest CDN caching options observed in all of our testing. The results were simply mind blowing
The testing environment included setting up caching method described below on an extremely heavy themed website on a slow shared hosting server. Without our highly optimized WordPress caching method explained here today the Page speed insights score was revealing a score of 22 on mobile and similar to desktop. The results also yielded better performance and lower error rates over using a single CDN service.
The results after implementing our best caching method saw over a 95% increase over the slow loading website without complicated optimizations methods.
As opposed to pages taking over 3 to 4 seconds to load. This method results in instant page loading regardless of how slow your hosting service is.
Different CDN providers have different options and functions. This setup allows you to get the best of both worlds and replaces options that one or the other of CDN providers don’t have.
Without wasting anymore time lets dig into one of the best and fastest caching setups of 2022.
Note. Our setup will require a very small investment. Peanuts. However there is a free trial in the paid component.
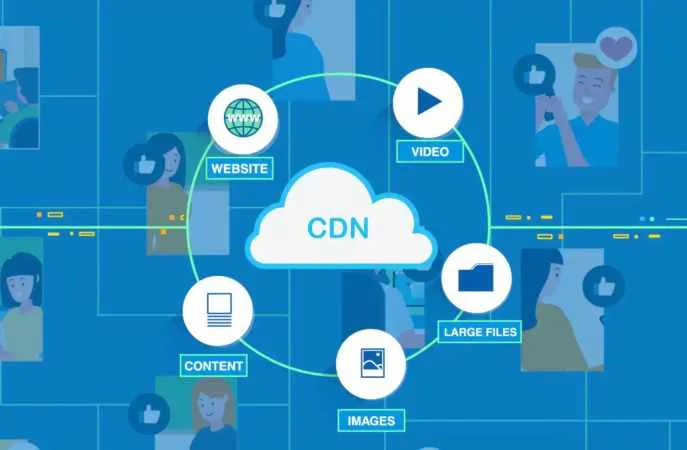
The setup includes implementing two separate CDN caching services. These caching services include:
- Cloudflare
- Bunny.net CDN
We will be using a combination of these two CDN services. The total setup time for a beginner should be less than 20 minutes.
This setup will leave you with the following best CDN caching configuration for super fast website response times.
- Fast DNS by Cloudflare
- Blazing fast website asset loading speed by Bunny.net CDN
Before pressing on with this tutorial for setting up the fastest CDN website caching solution we’ve found works the best for slow loading and heavy themed WordPress websites, it is highly recommended you optimize and reduce the image sizes on your website as much as possible for best results before storing them on CDN caches.
Ensure you have a good caching plugin installed such as WP-Optimize, WP Fastest cache or the lightspeed cache plugin for more experienced users. This solution also works best for those who’s hosting providers offer litespeed server side caching. However not necessary.
- Head over to www.cloudflare.com and signup for the free tier account.
- Once you have setup your account you will be asked to change your DNS settings at your current domain registrar level to point to Cloud flare’s name servers. You will be provided with the name server addresses after you signup for your account the first time. You will need to add these the addresses into your current domain name provider account. If you are unsure how to do this contact your domain name provider for assistance.
- Now this is where the big difference begins in terms of a standard Cloudflare setup. Today we are only going to be using Cloud flare for DNS and security only. They will be performing your DNS lookups but not caching your site.
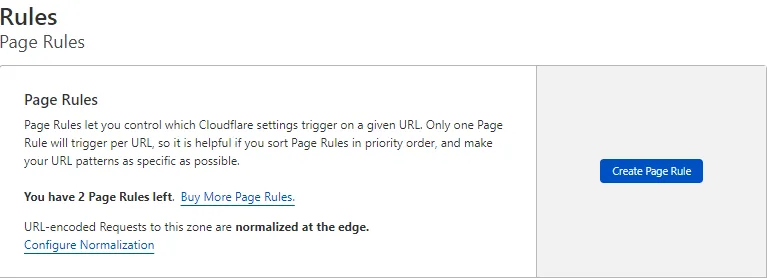
To achieve this we need to create a “Rule”
Head over the rules section in your Cloud flare account and select “Create Page Rule”
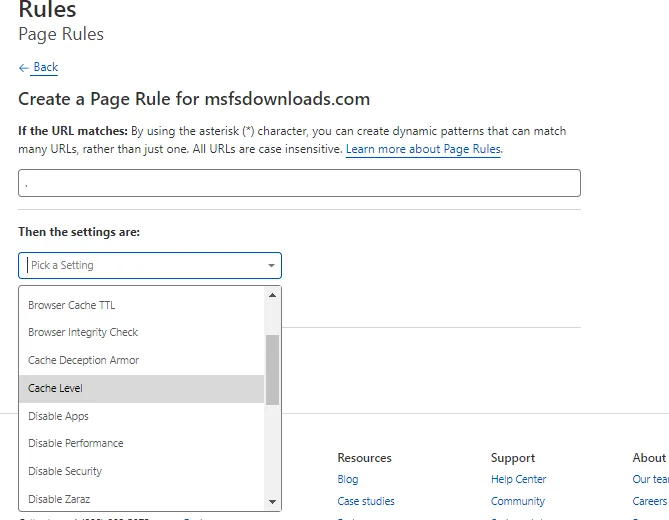
Next. Select the drop down box and choose the “Cache Level” Option
Follow the below instructions here and select “Bypass” You must add your domain name in here with with /* on the end.
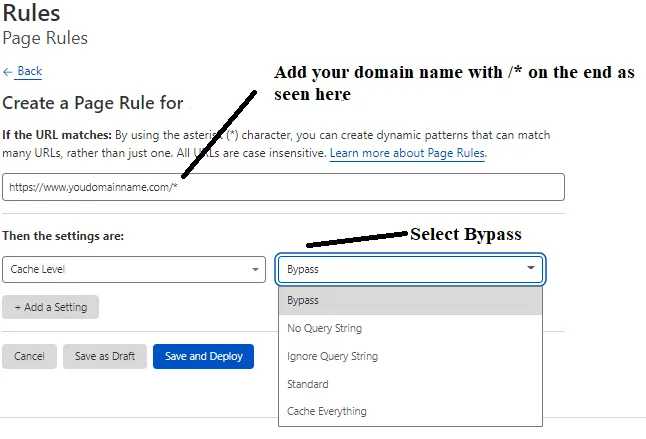
This will bypass the Cloudflare cache while still enabling them to perform much faster DNS lookups and protect your website with their security features
BUNNY.NET CDN
4. Now you need to head over to Bunny.net and setup an account there. Follow their setup instructions to create your “Pull Zone” and “Storage Zone”
BunnyCDN will be storing your CDN cache in this instance. Once complete download the BunnyCDN plugin and install it on your WordPress website. You will need to enter your BunnyCDN hostname address into the plugin. It will look something like this youwebsitename.b-cdn.net
If you have any issues with setting up your BunnyCDN account their support is amazing and often replies in under 5 minutes.
Within your BunnyCDN account be sure to also turn on the “Optimiser” functions as this is not turned on by default
Results.
For your first page requests after setting up our fastest CDN caching options you will notice load slow. This is because the cache is just starting to warn up on the Bunny Network. After you have loaded any page or article for the first time it won’t be warm yet on the CDN. So don’t panic or be disappointed. This is completely normal.
On the second load after it becomes warm you will be seeing blazing fast load times and close to 100% page speed metrics via Google Page Speed Insights and GTMETIX
As more visitors from around the world visit your website. Your website assets will start to become cached on more of Bunny CDNs strategically located POPs and your CDN Perma Cache will start to build and remain stored on the edge forever unless you decided to delete it.
This setup has two separate networks working in your favour here. Cloudflare increasing your DNS lookups providing a higher level of security and Bunny.Net for your CDN caching. There is an added SEO benefit here also.
Testing concluded setting up this CDN cache solution was more efficient and error free. Unlike Cloudflare you have direct access to a CDN support team at Bunny who can also guide you through the best setup configuration options on their network. Normal response time is generally within 5 minutes. Something you don’t get with other edge cache providers.
Another reason for using Bunny.net for your edge cache and bypassing Cloud flare.
Using Cloudflare’s DNS is great. However, if you require any kind of caching, optimisation or CDN support you will need to pay up for a high cost business or premium plan. There is no support for the free basic plan. If you have a mission critical website operating its backend machinery without support this would be bad idea.
For support features and an SLA on Cloudflare expect to pay a minimum of $200 per month. If you go the Bunny route for as much as $10 for up to 3 months of service (Depending on your traffic and usage) you get blazing fast asset loading and almost instant 24/7 support. This is another huge reason to have cloudflare run your DNS routing only and have Bunny CDN do the heavy edge cache lifting and optimisations.
Bunny.net optimisations include.
- Bunny Optimser.
- WebP Image Compression
- Dynamic Image Processing API
- Minify CSS Files
- Minify JAVA Script Files
- Smart Image Optimisation
Concluding.
This is our most highly recommended CDN caching option for 2022. It will provide you a distributed suite of blazing fast WordPress performance enhancements for slow WordPress websites on shared hosting servers while being assured with 24/7 high quality CDN help and support.
Your final config will result in.
- Faster DNS lookup speeds using the Cloudflare network
- Blazing fast website asset loading speeds on Bunny CDN while avoiding high support costs
Bunny CDN hope to have their own DNS and proxy cache also available in 2022 (Currently in beta)